Master the Art of Carving a Turkey: Step-by-Step Guide to Perfectly Sliced Thanksgiving Delight
Carving a turkey is an essential skill for any aspiring chef or home cook. Whether it's Thanksgiving or any other special occasion, knowing how to carve a turkey will elevate your culinary skills and impress your guests. The art of carving involves precision, technique, and a little bit of practice. In this step-by-step guide, we will walk you through the process of perfectly slicing a Thanksgiving delight. So grab your carving knife and let's get started!
Tools and Equipment Needed
To carve a turkey like a pro, you'll need the right tools and equipment. Here are the essentials:
1. Carving Knife: A sharp, long-bladed carving knife is crucial for clean and precise cuts.
2. Carving Fork: A sturdy fork with long tines will help hold the turkey steady while carving.
3. Cutting Board: Use a large, sturdy cutting board with a groove to catch any juices.
4. Kitchen Shears: These come in handy for removing the backbone or cutting through joints.
5. Serving Platter: Choose a platter that can accommodate the carved turkey pieces.
6. Clean Towels or Gloves: Protect your hands from heat and ensure a firm grip on the turkey.
Having these tools ready will make the process of carving much easier and enjoyable!
Preparing the Turkey for Carving
Before you begin carving the turkey, it is essential to prepare it properly. Start by letting the cooked turkey rest for about 20 minutes to allow the juices to redistribute. This will ensure that the meat remains moist and flavorful.
Next, place the turkey on a clean cutting board or platter. Use a sharp knife or carving fork to stabilize the bird while you work. If needed, use kitchen towels or oven mitts to protect your hands from heat.
To make carving easier, remove any trussing strings or metal clips that may be holding the legs and wings in place. Gently pull and cut away any excess skin around the neck cavity.
Lastly, remember to sharpen your carving knife before starting. A sharp knife will make clean and precise cuts, resulting in beautifully sliced turkey meat.
Carving the Turkey: Step-by-Step Instructions
4.1. Removing the Legs and Thighs
Start by holding the turkey steady with a carving fork. Use a sharp knife to cut through the skin between the breast and thigh. Pull the leg away from the body until you can see where it connects to the joint. Cut through this joint to remove the leg and thigh in one piece.
4.2. Separating the Wings
Hold the turkey firmly and use your knife to locate where each wing connects to the body. Cut through these joints, separating each wing from the turkey.
4.3. Slicing the Breast Meat
Begin by making a horizontal cut just above the wing joint, parallel to the breastbone. Continue slicing downward, using smooth, even strokes until you reach the bottom of the breastbone. Repeat on the other side.
4.4. Carving the Dark Meat
To carve dark meat, hold one leg at a time and locate where it connects to the thigh joint. Cut through this joint to separate them into individual pieces.
Remember to always slice against (perpendicular) to the grain of meat for maximum tenderness and flavor.
1. Removing the Legs and Thighs
To begin carving the turkey, start by removing the legs and thighs. Use a sharp carving knife or a boning knife for this step. Hold the turkey steady with a carving fork or tongs to ensure stability. Locate the joint where the leg connects to the body and make a deep cut through the skin and meat. Apply gentle pressure to separate the leg from the body, cutting through any remaining connective tissue if necessary. Repeat this process on the other side of the turkey to remove both legs and thighs. Place them on a serving platter or cutting board for further slicing or serving.
2. Separating the Wings
To separate the wings, start by locating the joint where the wing connects to the body. Use a sharp knife or kitchen shears to cut through the joint, separating the wing from the turkey. Repeat this process on the other side of the turkey. The wings can be served whole or further divided into smaller pieces, depending on your preference. Remember to take your time and use caution when separating the wings to avoid any accidents.
3. Slicing the Breast Meat
To slice the breast meat, begin by making a horizontal cut along the base of the turkey breast. This will help loosen the meat from the bone. Next, make vertical slices starting from the top of the breast and working your way down. Aim for slices that are about ¼ inch thick. As you slice, be sure to keep your knife parallel to the cutting board for even and consistent slices. Repeat this process on both sides of the turkey breast until all the meat has been sliced. The breast meat is often considered the juiciest and most tender part of the turkey, so take your time to savor every delicious slice.
4. Carving the Dark Meat
Once you have successfully removed the legs, thighs, and wings from the turkey, it's time to move on to carving the dark meat. The dark meat refers to the meat found in the legs and thighs, which is known for its rich and juicy flavor.
To begin, place one leg on a cutting board with the drumstick facing away from you. Use a sharp carving knife to make a horizontal cut where the thigh meets the drumstick. Apply gentle pressure to separate the joint and continue cutting until you completely remove the drumstick.
Next, locate the joint where the thigh bone meets the backbone of the turkey. Cut through this joint using a sawing motion with your knife. Once separated, repeat these steps for the other leg.
Now it's time to carve the thigh meat. Hold one thigh firmly with a carving fork and make thin slices across the grain of meat. This will ensure tender and easy-to-eat pieces.
For serving purposes, transfer the carved dark meat onto a platter or individual plates. Repeat these steps for carving the other thigh.
Remember, practice makes perfect when it comes to carving a turkey. Don't be discouraged if your first attempt isn't flawless – with time and experience, you'll become more skilled at achieving beautiful slices of dark meat that are sure to impress your guests.
Stay tuned for our final section on serving and presentation tips to elevate your Thanksgiving feast!
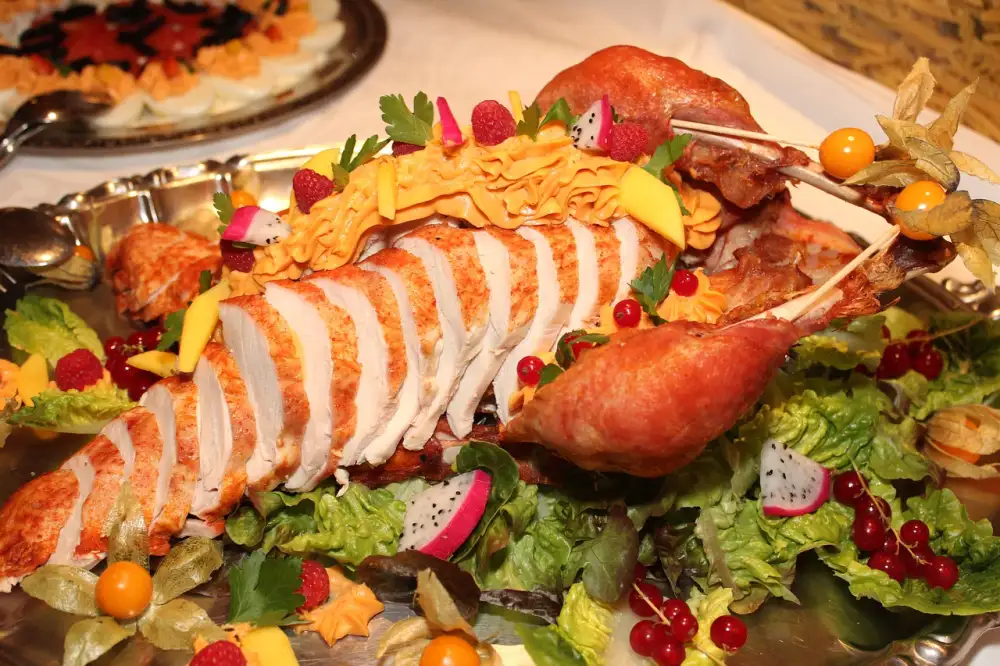
Serving and Presentation Tips
When it comes to serving and presenting your beautifully carved turkey, there are a few tips that can take your Thanksgiving feast to the next level. Firstly, arrange the sliced breast meat on a platter, fanning out the slices for an elegant display. Next, neatly arrange the dark meat alongside the breast slices. To add a pop of color, garnish the platter with fresh herbs such as rosemary or thyme. For an extra touch of sophistication, drizzle some homemade gravy over the sliced turkey just before serving. Remember to provide separate serving utensils for each type of meat and have plenty of warm dinner rolls or bread on hand to complement the meal. With these presentation tips, your perfectly carved turkey will not only taste amazing but also look like a work of art on your Thanksgiving table.
Safety Precautions while Carving
1. Use a sharp carving knife: A dull knife can slip and cause accidents. Ensure your carving knife is sharp to make clean cuts without applying excessive force.
2. Secure the turkey: Place the turkey on a stable cutting board or tray to prevent it from moving while you carve. This will reduce the risk of accidental slips.
3. Keep your hands dry: Moisture on your hands can make it difficult to grip the knife properly, increasing the chances of accidents. Dry your hands thoroughly before handling the knife.
4. Work in a well-lit area: Good lighting is essential for proper visibility while carving. Make sure you have adequate lighting to clearly see what you are doing and avoid any mishaps.
5. Take your time: Rushing through the carving process can lead to careless mistakes and injuries. Be patient, focus on each cut, and take your time to ensure precision and safety.
6. Watch out for bones: When carving, be cautious of any small bones that may be hidden within the meat. Cut slowly and carefully around these areas to avoid accidentally cutting yourself or others.
Remember, safety should always be your top priority when handling sharp knives and working with raw poultry. By following these precautions, you can enjoy a safe and successful turkey-carving experience.
Carving a turkey may seem daunting at first, but with practice and following these step-by-step instructions, you can become a master carver. Remember to use the right tools and equipment, such as a sharp carving knife and carving fork, to ensure clean and precise cuts. Preparing the turkey properly by letting it rest and using a cutting board with a groove will make the process easier. By removing the legs and thighs first, separating the wings, and then slicing the breast meat and dark meat separately, you can create beautiful slices that will impress your guests. Lastly, remember to follow safety precautions to avoid any accidents while carving. With these tips in mind, you'll be able to elevate your Thanksgiving dinner presentation and showcase your culinary skills. Happy carving!
Published: 05. 12. 2023
Category: Food